How to create live classes on YouTube and insert on Coursify.me?
Live streaming is a resource widely used today to teach classes, attract students and promote greater engagement by the audience.
– Advantages of live streaming your classes
Follow the step by step below to create live classes on YouTube and insert it on your Coursify.me page:
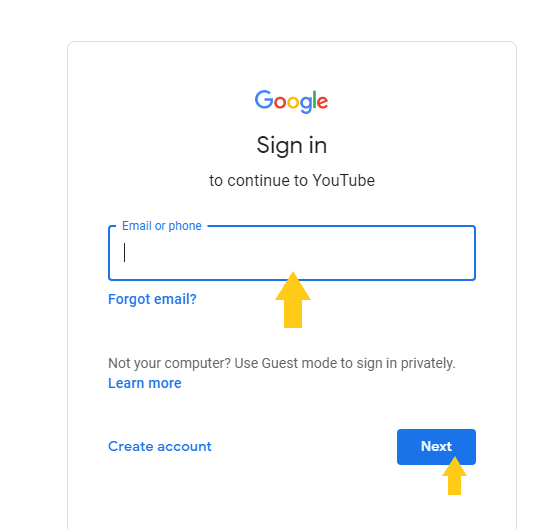
1) Access your YouTube account through the “Sign in” option:
2) Enter your email or, if you don’t have an account on the platform yet, click on “Create Account” and follow the instructions:
3) On your computer screen, click on the “create” icon option as shown below:
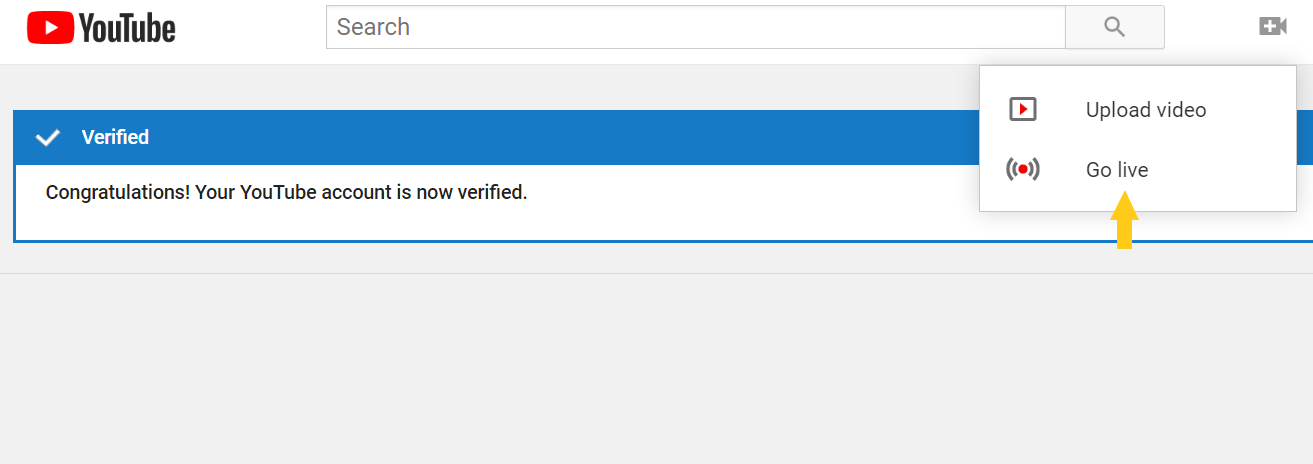
4) Next, click on “Go live”:
5) If you do not have the feature enabled on your channel, the following message will appear.
Click “Enable”:
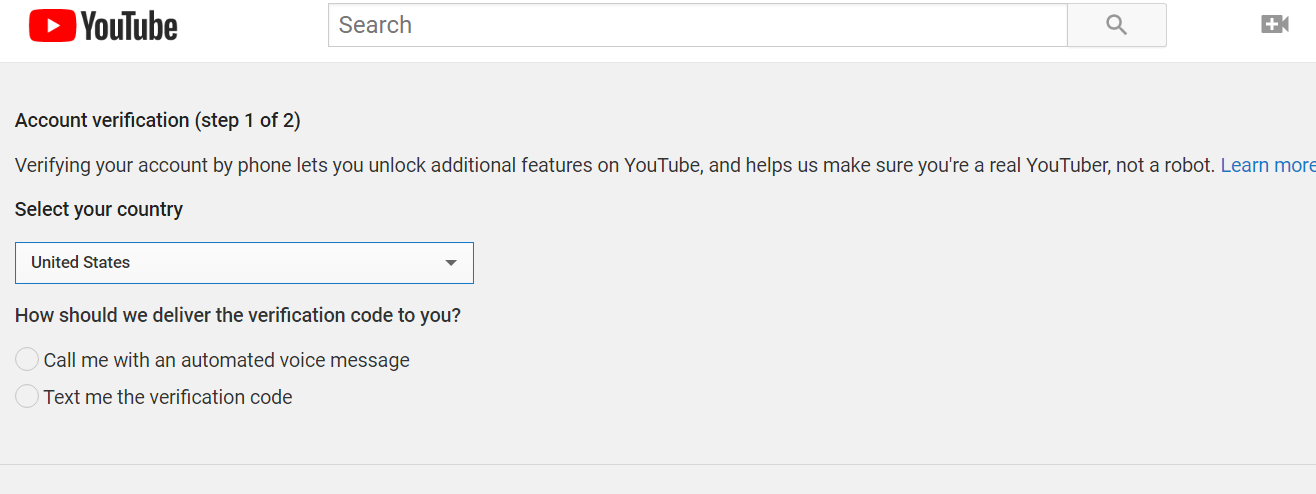
6) To access the resource, click “Verify”:
7) Select the best option to receive the verification code (phone call or text message):
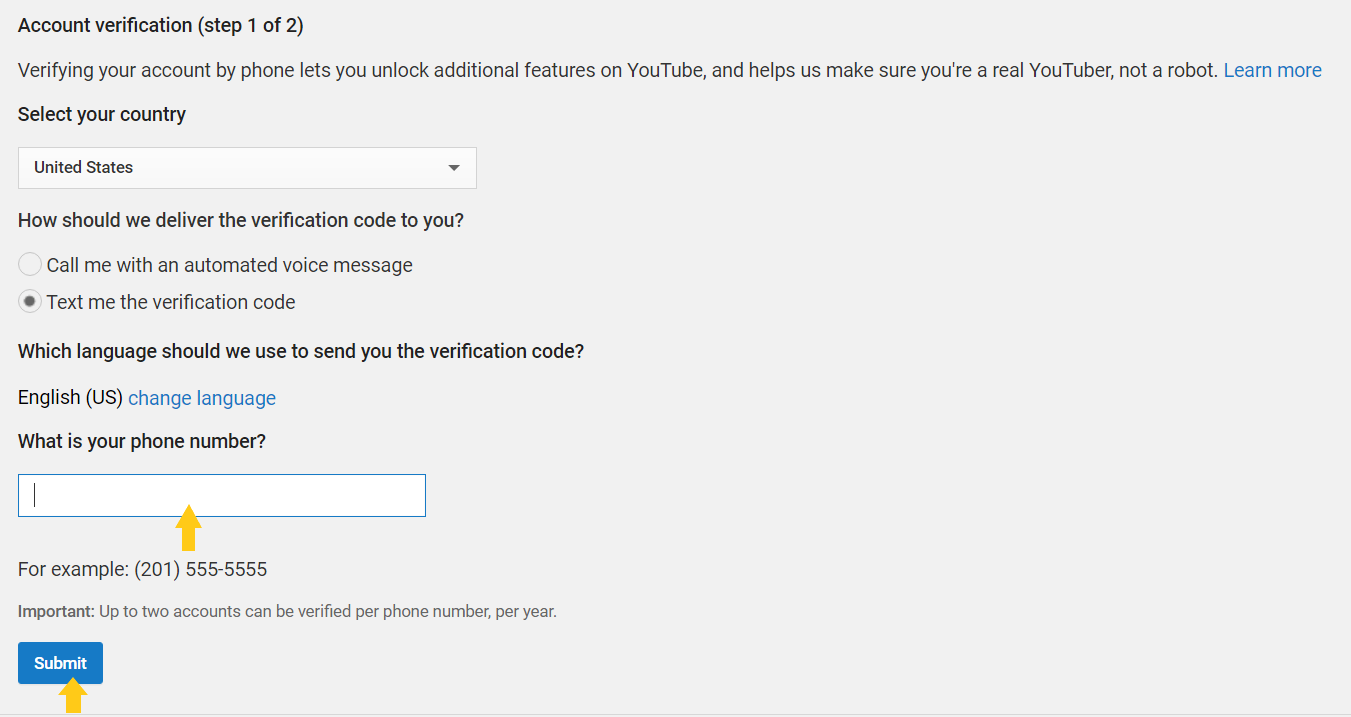
8) After selecting the desired option, enter your cell phone number and submit:
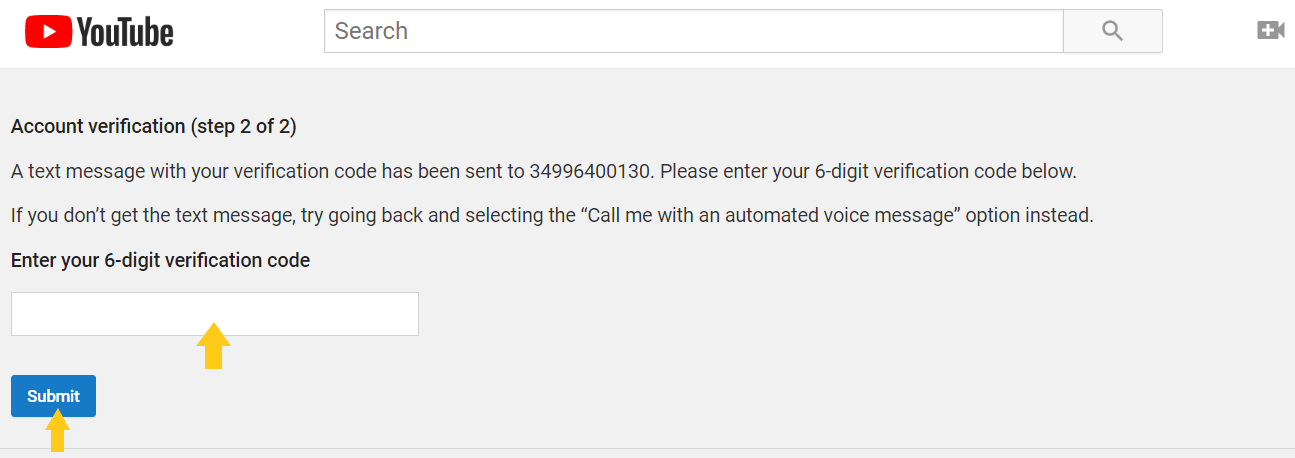
9) Enter the received 6-digit verification code and click on “Submit”:
10) Your account has been verified:
11) Now, click again on the “Create” and “Go live” icon:
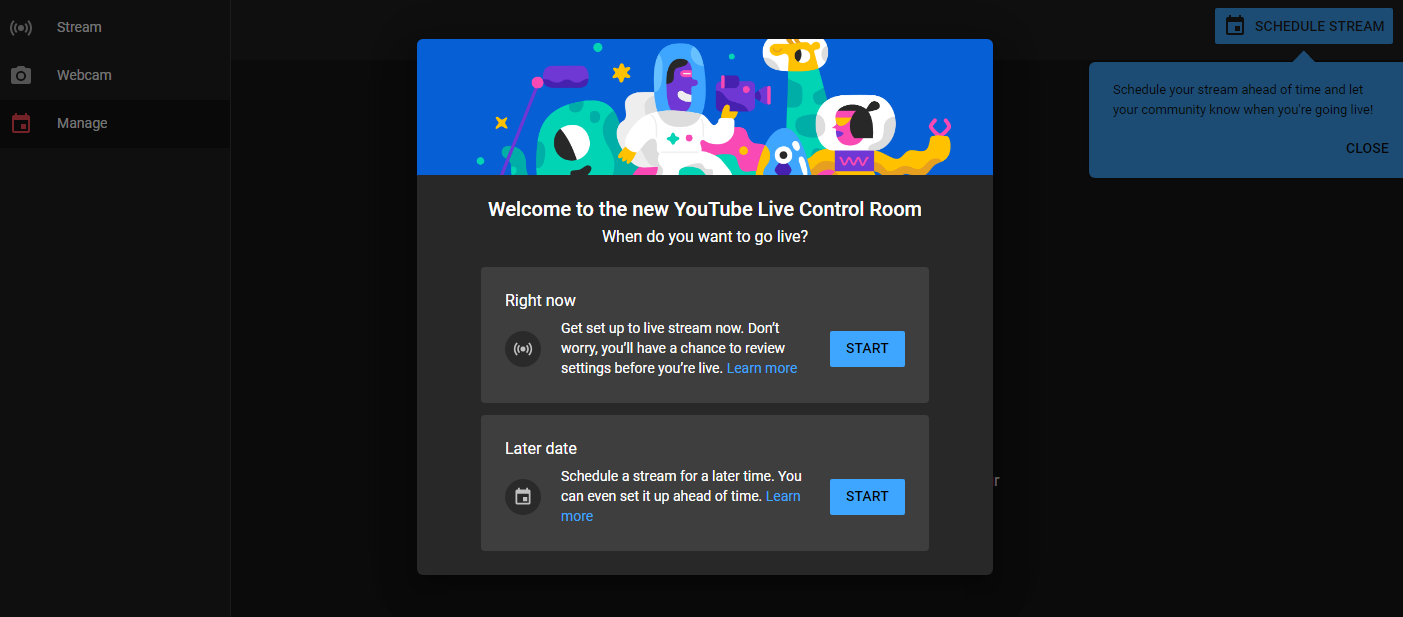
12) In the first option, when you click “Start”, you can configure to perform the live broadcast at the same moment. In the second option, you can schedule the transmission for another time.
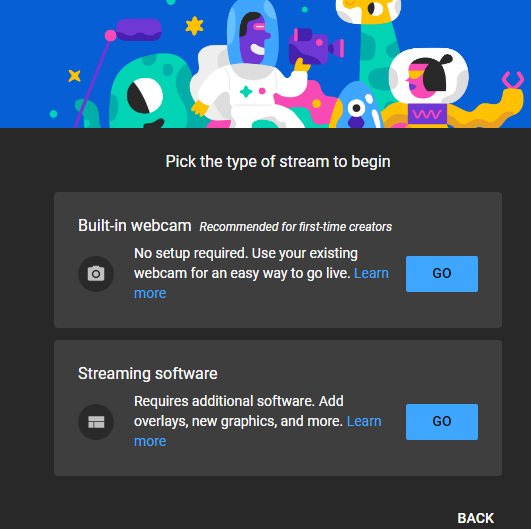
13) Choose the type of transmission you want through the option “Go” in Built-in webcam or Streaming software:
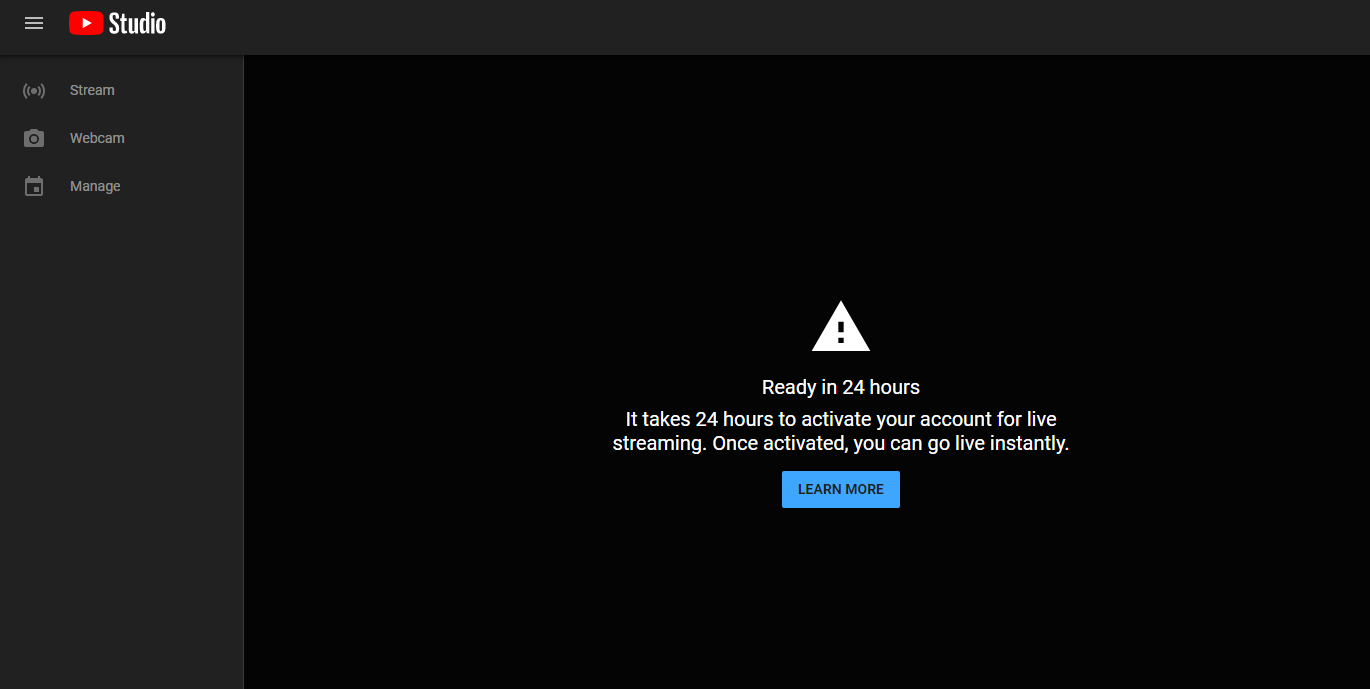
14) If you have not yet performed the first live streaming, there is a 24-hour deadline for releasing the resource as per the message below:
15) If those 24 hours have passed or you have access to the streaming resources, access the YouTube platform again and click on the “Create” and “Go live” icon:
16) The screen below will appear again and you can start the live streaming or schedule it for later:
17) By activating the “Later date” option, you can schedule the transmission for the desired date and time.
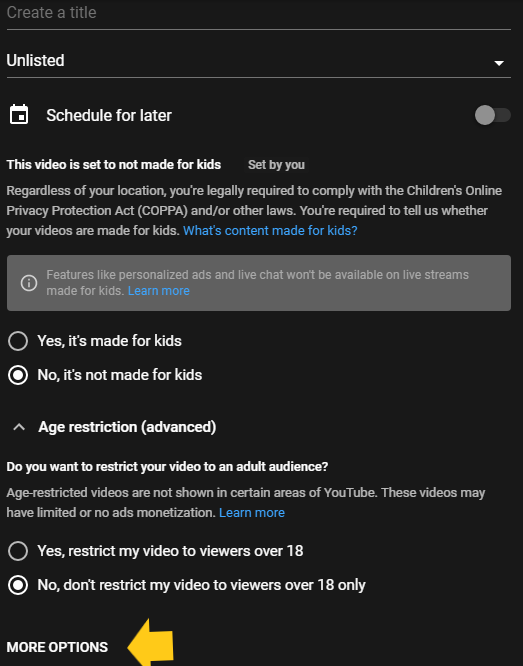
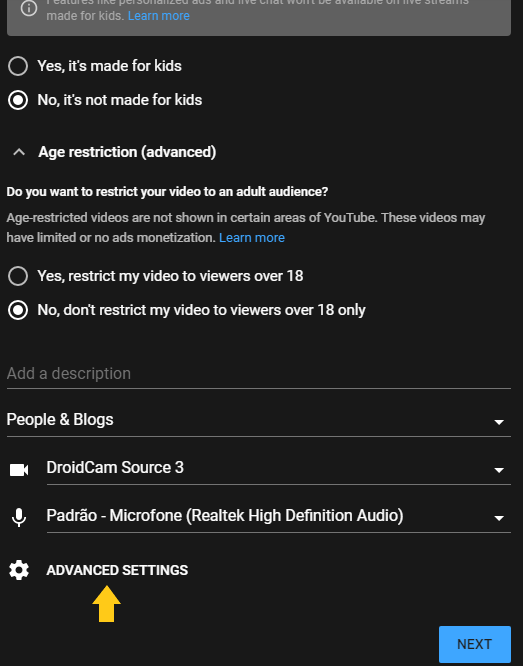
Then fill in the title, select “Unlisted”, check the option whether or not it is content for children, set the video restriction, add a description and category, and click on advanced settings to activate the chat:
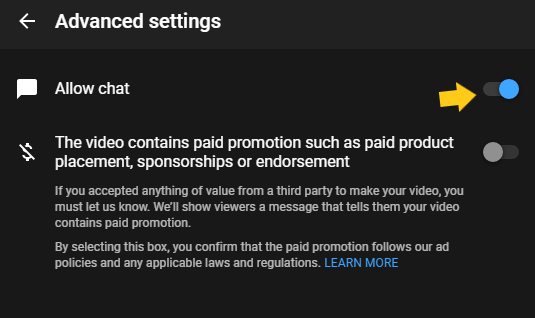
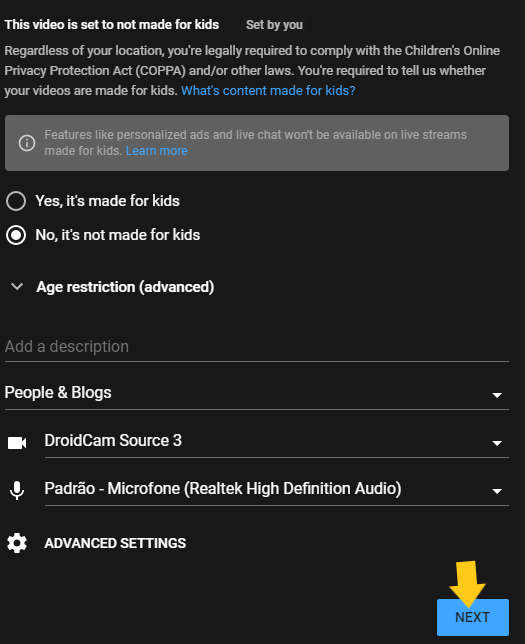
18) If you wish, activate the chat and, if necessary, activate the second option for paid promotions, such as paid product insertion, sponsorship or endorsement. Then, return to the screen and proceed:
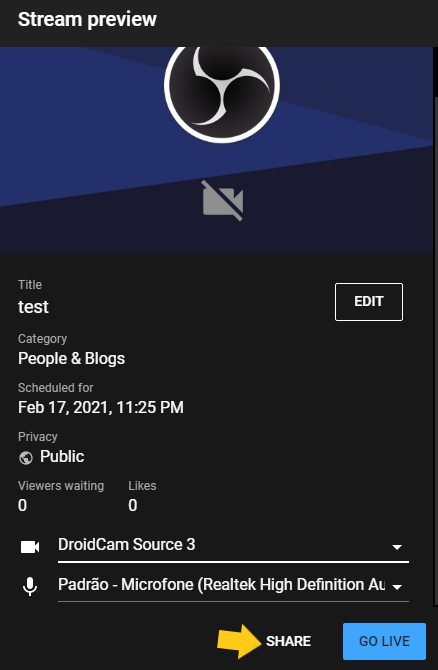
19) Click “Share” to copy the video link:
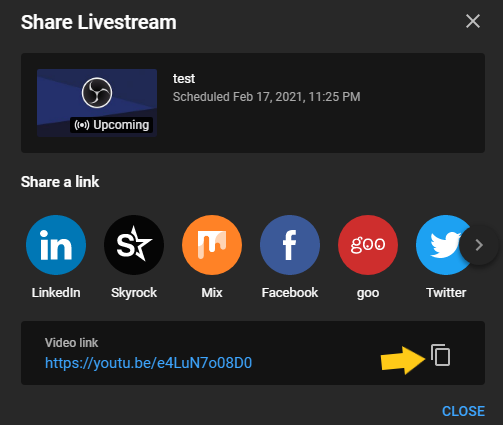
20) Copy the video link:
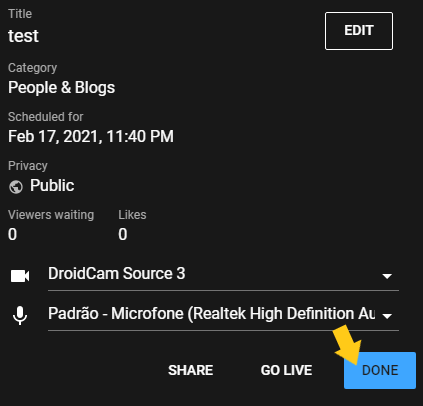
21) Click “Done”:
Now, let’s insert the link on the Coursify.me platform.
22) Access the menu> My Courses> All Courses:
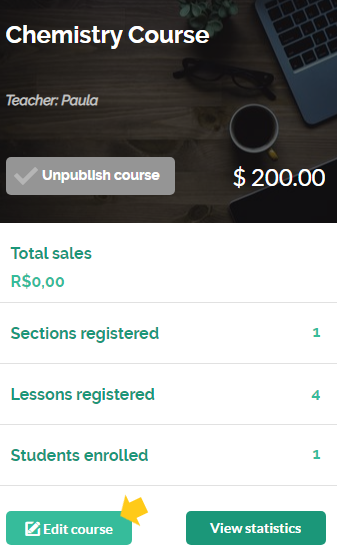
23) On the course card, select “Edit Course”:
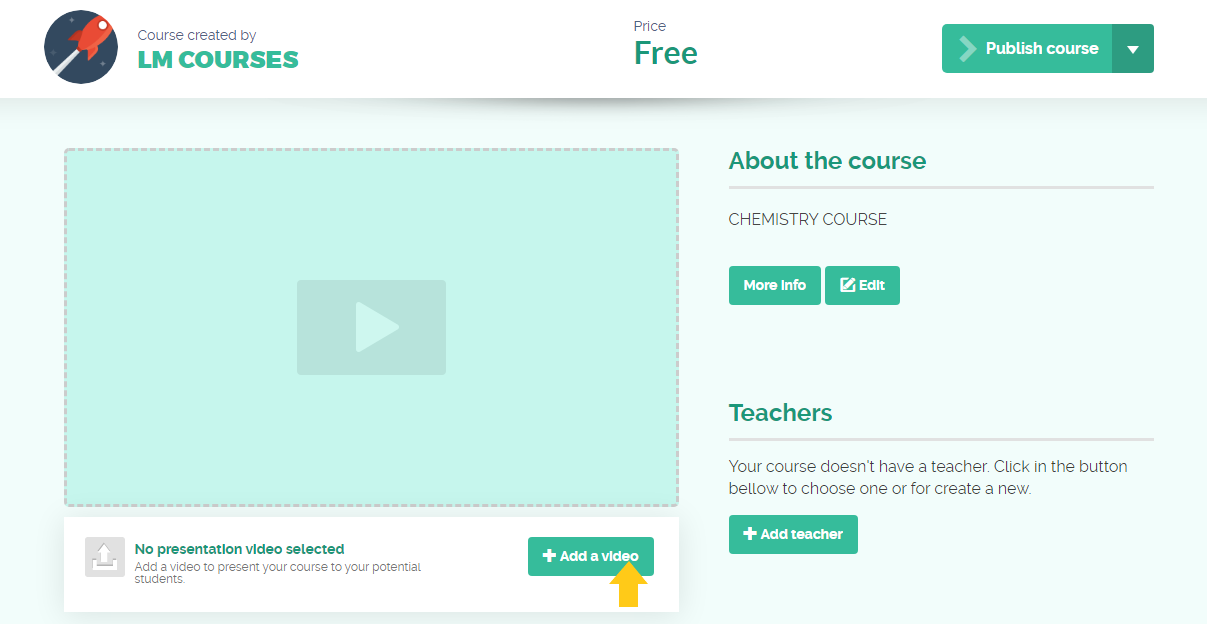
24) You will be able to add the live stream on the course presentation video or in a lesson, however, it is important to communicate your students about the date, time and how to access the material.
For the content to appear in the video presentation field, just click on “Add a video”:
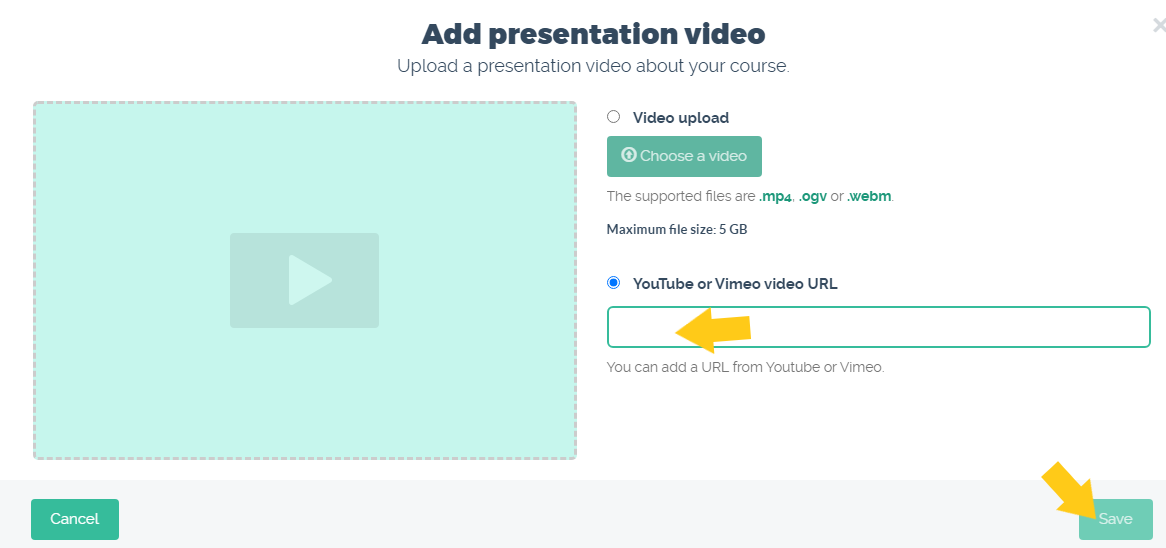
25) Select the “URL” of the video on YouTube, fill in the field with the link and save:
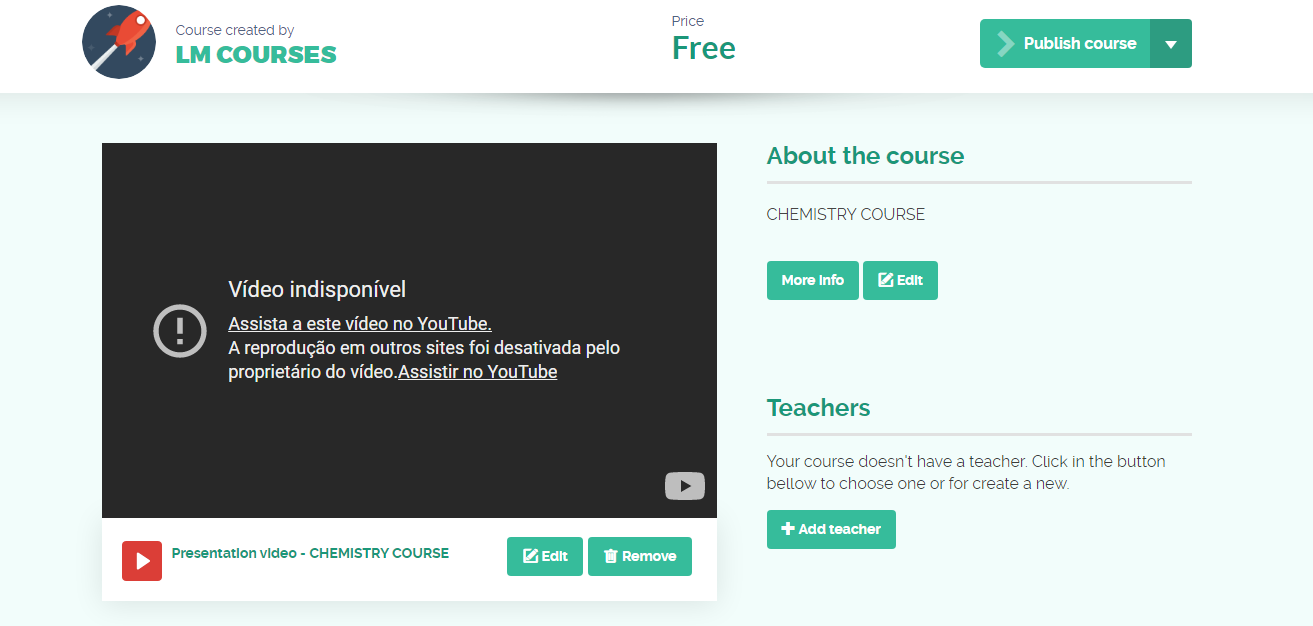
26) Depending on the settings of your YouTube account, the message “unavailable” may appear, forcing the student to click on the link to be redirected and watch live from YouTube.
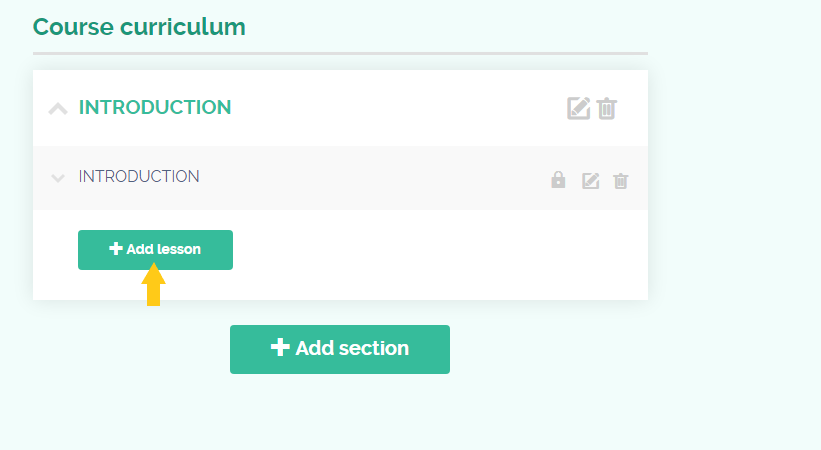
27) To add the video to a lesson in the course, go to the curriculum section of the course and click on add lesson:
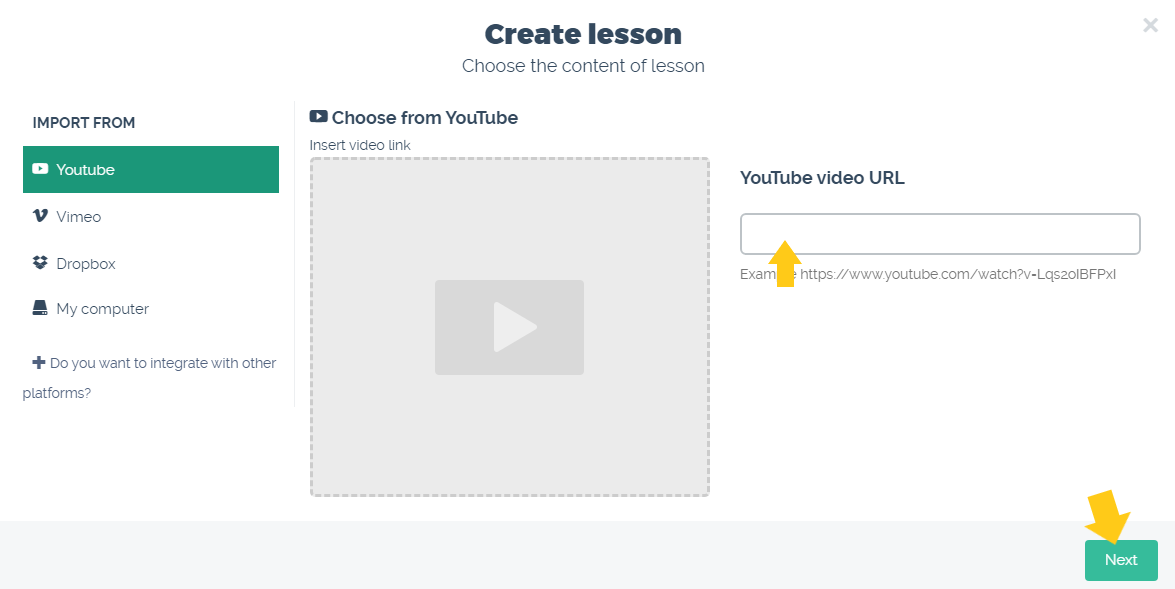
28) On the next screen, insert the video link and proceed:
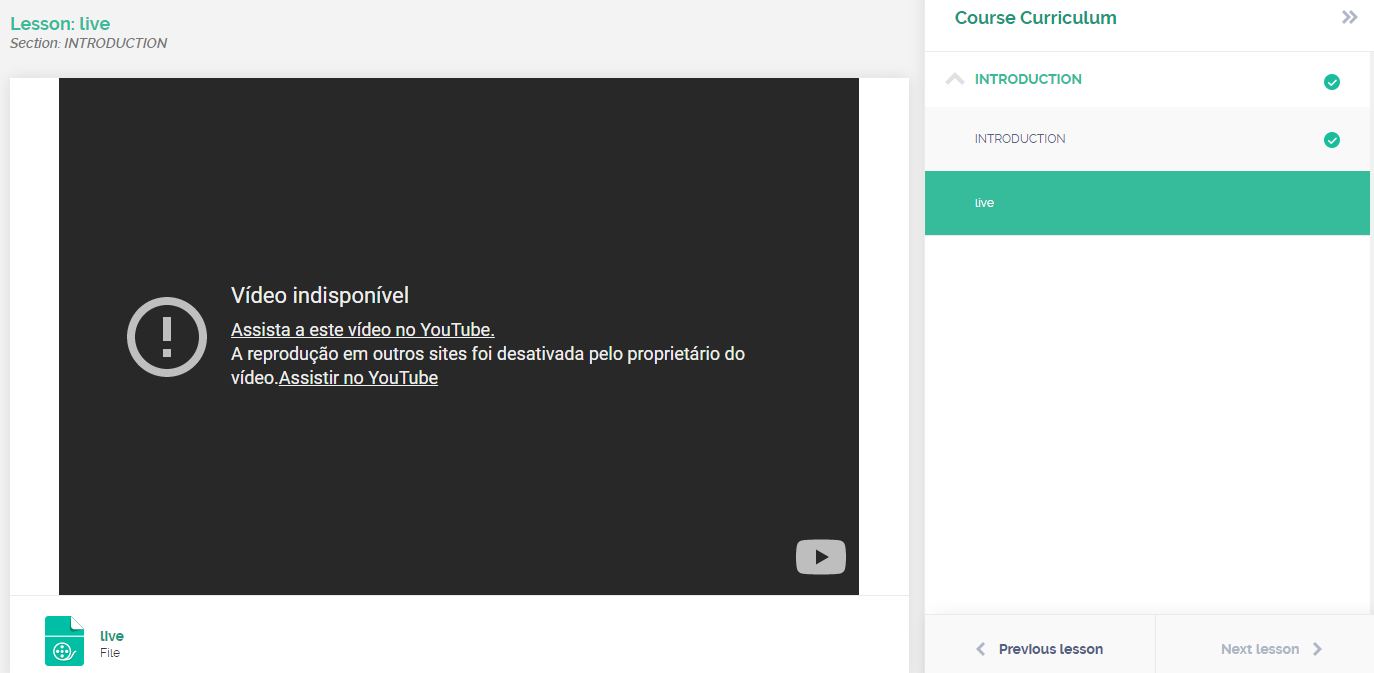
29) Depending on the settings of your YouTube account, the message “unavailable” may appear, forcing the student to click on the link to be redirected and watch live from YouTube.
Done! The live stream was added to your school’s page on Coursify.me.
Serving companies and professionals in more than 60 countries, Coursify.me is a dynamic and customizable eLearning platform.
We have three options of plans for you to decide which one best suits your needs. Visit our website, test the platform and start creating and selling online courses right now!
Articles in this section

