How do custom fields work?
When the student enrolls in an online course, a few standard information are asked. Now, with Custom Fields, you can create new fields to request additional information from your students.
This tool is very useful to capture data that can assist your marketing and sales strategy.
It can also be used to find out what your student is looking for and what their needs are, which helps to profile the target audience of your course and apply strategies to attract new customers.
Follow the step by step below to add a custom field:
1) In the menu of the school page click on “Resources” and “Custom Fields”:

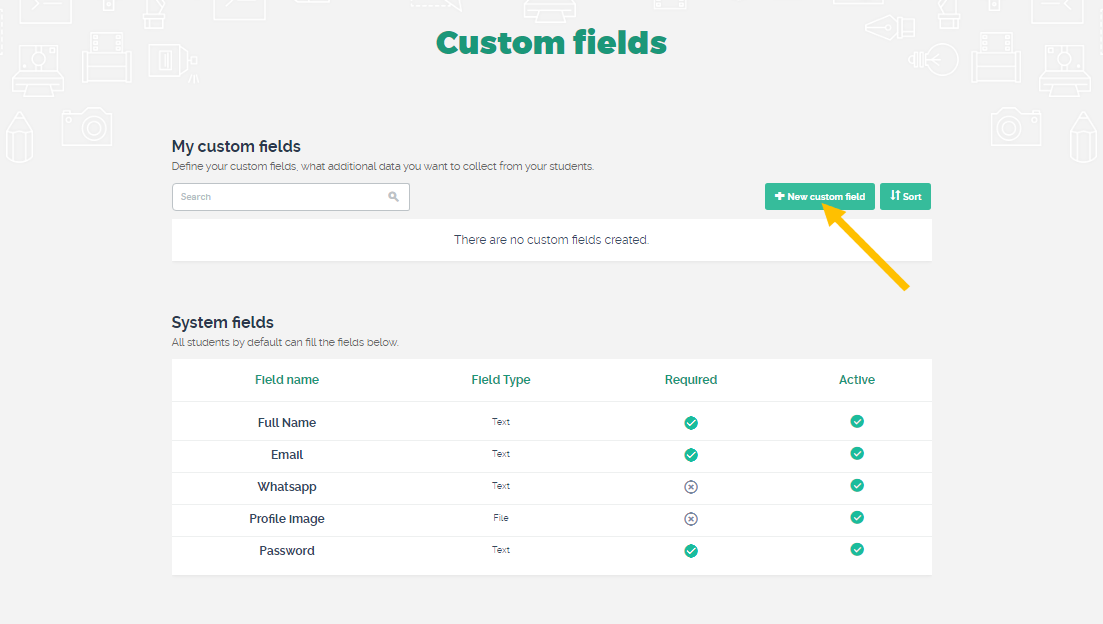
2) Note that there are some standard fields in the “System fields” section:

3) To create a new field, click on “New custom field”:
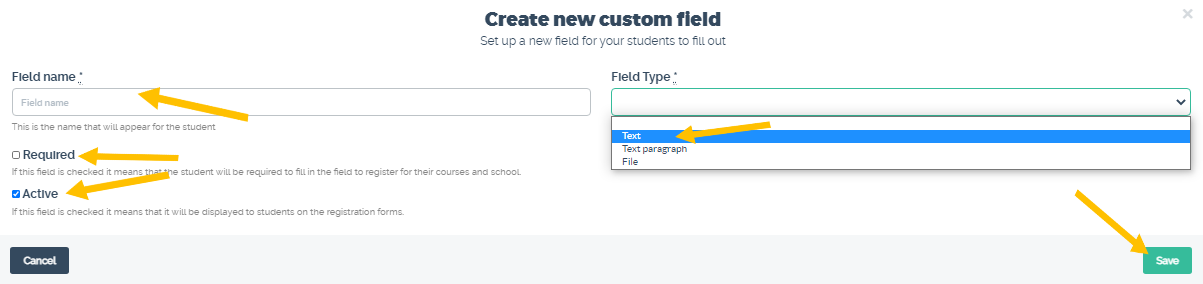
4) Choose the name of the field, which can be a word, phrase or even a question.
Select the field type:
– Text: for the student to include several sentences.
– Text paragraph: for the student to add a paragraph with the desired information.
– File: for the student just add a file, such as a proof of income, for example.
Next, determine whether the field will be mandatory, so the student will be required to complete it to register for courses and school.
Leave the “Active” option checked, if you want the field to be displayed to students on the registration forms.
Finally, click “Save”:
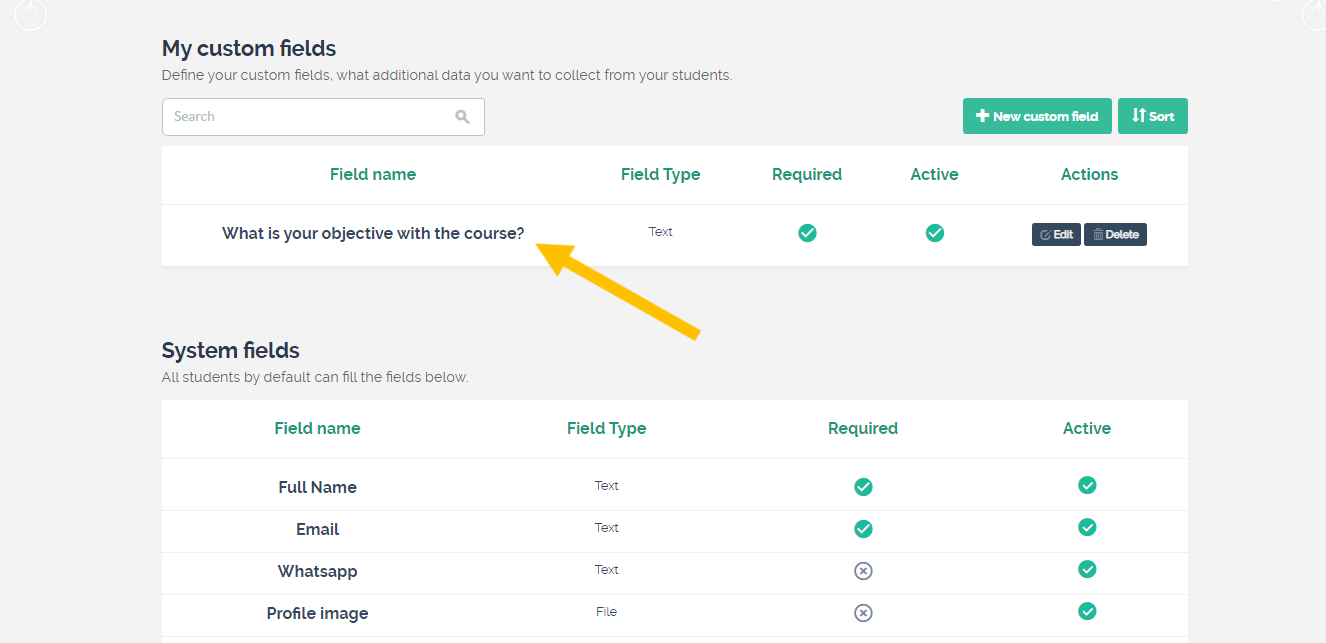
5) The custom field was created:
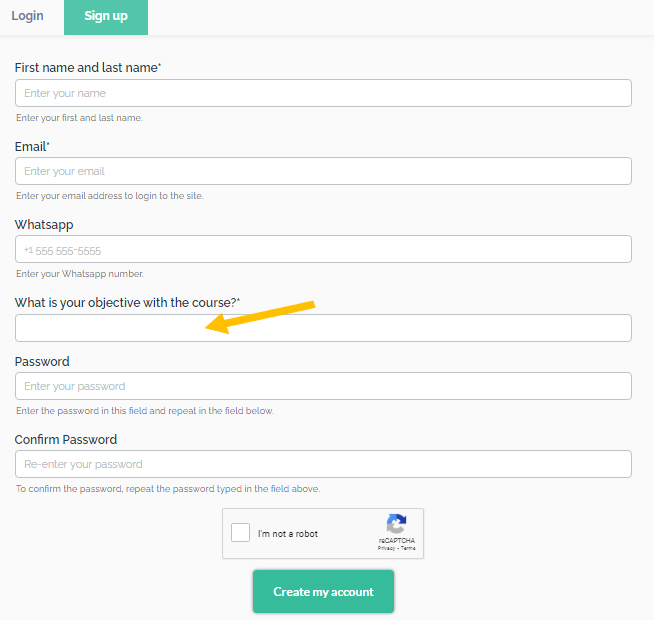
6) When registering in the course, the student can fill in the field:
Enjoy this new functionality on Coursify.me and create the necessary fields to request more information and get to know your students better.
We hope this article has been helpful for you to create your online courses on Coursify.me.
Any questions, we are available.
Articles in this section