How to set up a studio to record videos at home
To record videos, before you start, you need to prepare the environment and the equipment you will be using.
Fortunately, you can create an amazing studio on a budget, as long as you’re prepared to be a little creative.
Here’s how to turn your home into a professional-grade studio:
1. Camera
Since most people don’t have a professional video camera, using a smartphone, laptop, or webcam is the second best option.
The good news is that most modern smartphones are capable of recording videos with excellent resolution. If this is your option, make sure your phone is capable of capturing images in 4K resolution.
Now, if you’ve got the money to invest and want to shoot videos with the highest quality, get a DSLR, especially ones where the screen can swivel outward so you can see yourself as you shoot.
– How to choose the right camera to record videos
Camera
The next step is to position the camera at the perfect angle, and for that you will need a stand, something that will keep the camera stable.
It’s always possible to lean the camera on a pile of books and things like that, but if you want to make your life easier and ensure a good result, here are some options to consider:
Tripod
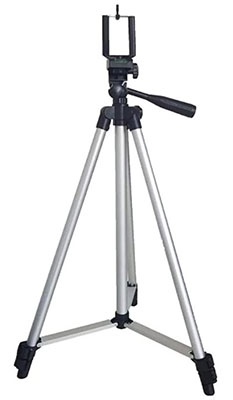
The tripod is a simple and practical support that makes all the difference when recording videos, giving stability to the footage and allowing you to adjust the height and angle of the camera. On the internet you can easily find options that fit the most varied budgets. Believe us, it’s worth the investment!
Gorillapod
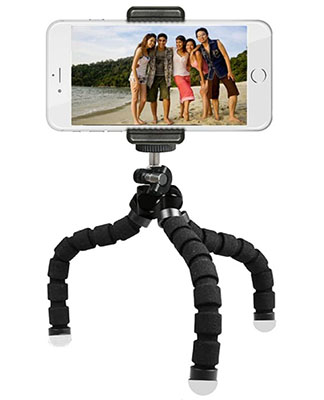
This type of stand has flexible legs that you can attach to different types of surfaces (such as tables, pillars, etc.), which is really useful for positioning your camera at the perfect angle, no matter in what environment you’re shooting.
Desk Mount
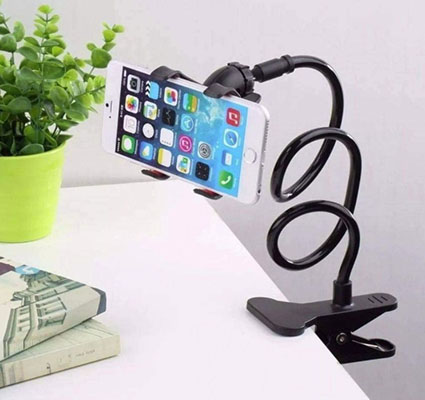
This phone mount is perfect for top-down shooting as it mounts to the surface you’re working on and features a flexible neck for setting the framing. An excellent option for those who need to film manual tasks, for example, preparing a recipe or assembling a product.
TIP: Leave enough space around the subject (main object/person to be filmed) so that the video can be easily cropped on different platforms (e.g. a 16:9 video for YouTube can be cut into a 9:16 video for IGTV or Reels).
2. Lighting
Don’t underestimate lighting, it makes a big difference in the final result, especially to record videos using a smartphone or laptop.
Here are some equipment that help improve lighting when shooting:
Softbox
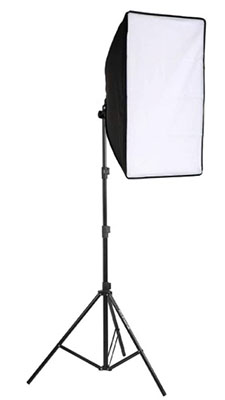
A softbox is a simple piece of equipment that illuminates a large area with a softer light.
This method works well if your space is big enough (in a smaller area, it can make everything look hard and overexposed).
Light fixture
If your space is small, you may not have the option to use a softbox.
To work around this, point a light fixture at a white wall so the light reflects back at you, creating a wider, softer light source.
Natural lighting
Instead of investing in a softbox, you can stand facing a window.
However, you need to consider where the light comes from to avoid exposure problems.
The best position in case you use light that comes from a window, is to stand beside or in front of it. Make sure there isn’t too much light behind you, otherwise only your silhouette will appear.
If you can’t get away from a window behind you, a good tip is to cover it with an opaque white curtain to soften or diffuse the incoming light.
3. Audio
Audio quality is indispensable for creating online courses, as your students need to hear everything you say clearly.
For best results, use an external microphone and synchronize the audio during the editing process.
Microphone
Even if you have great content, if the audio quality is poor, the learning experience of your students will suffer, so our advice is to use the best microphone you can afford.
Snowball microphone
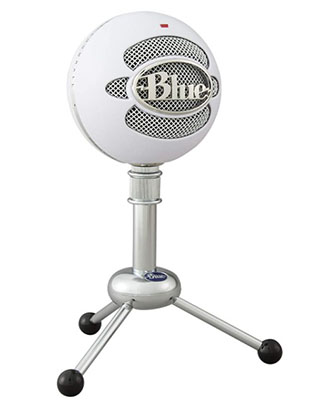
You can use a snowball microphone to record videos over a wider area (like a room) or even with several people talking (like a podcast).
This is also a good microphone if you plan on adding narration to already recorded video or streaming it.
Lapel microphone
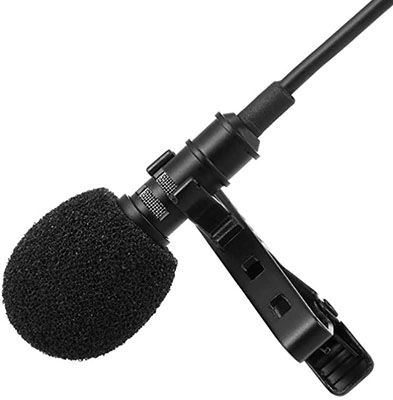
The lavalier microphone is extremely directional and can clearly capture your voice.
Easy to carry, it’s perfect if you’re shooting outdoors, broadcasting live, or moving around a lot while shooting.
These are some microphone options, but there are several others on the market at different prices. Do good research and see which best suits your needs.
– 4 Great Voice Recorders for your Business
Shoot in a carpeted space or somewhere with a lot of upholstery. This helps to “dampen” the sound and reduce echo. Likewise, avoid recording in an empty room with bare walls, as this can make the audio sound diminished.
4. Background
The location you choose to shoot can have a big impact on the professional look of your video.
Use plants, tables, ornaments, chairs, books and pillows to add personality to your videos, but not all at once. You want your students to pay attention to you, and not end up lost in the confusion that is the room around you.
If you don’t have a viable space, use a seamless paper backdrop in a color that aligns with your brand.
And that’s it! With these simple tips, you are able to record videos at home with professional quality.
Articles in this section